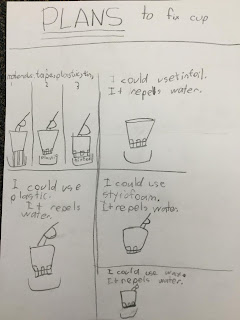
As scientists, we used our background knowledge about what materials absorb liquids and which materials repel liquids. We looked at our "paper test" we did last month where we explored what paper, paint adhered to best. Since the paint did not absorb into the tinfoil or the wax paper, some kids choose them to line their cup. One group, placed their cup inside a bigger plastic cup, while another group decided to put raincoat material on the bottom. Mrs. Wacker thought that plastercine would be a good barrier, but after only a minute the water penetrated through and started leaking. We quickly discovered paper and even cardstock quickly got very weak when wet and started to leak. The tinfoil looked at first like a good container, but it leaked during the lunch hour. We also discussed the purpose of a cup and some other considerations we needed to account for, like cleanliness and function. We thought of containers we use in our daily life and what materials they are made of and how they are used and what some of their pros and cons are.
-metal water bottle: study and waterproof but heavy and expensive to make
-dixie cup: light, cheap and waterproof due to waxy coating but not very sturdy (good for single use)
-glass cup: waterproof but fragile and can be dangerous if broken
-plastic water bottles: pretty inexpensive and durable...probably why there are so many!
-styrofoam cup: inexpensive, waterproof, insulated....but not great for the environment, that is why coffee shops do not use them very often. Starbucks uses coated paper cups to be more environmentally friendly.
-ceramics cups: heavy and fragile....need to have glazing on them to be waterproof.
To clean up our mess, Mrs. Wacker enlisted the help of her hairdryer. The children thought this was kinda crazy. (We talked about how "unexpected behaviours", like using a hair dryer at school, can put us in the yellow zone and make us very excited or even silly.) We took some calming breaths, then discussed how the heat and blowing air of a hair drying can help evaporate the liquid water to water vapour. We disucssed how we use hair dryers, clothes dryer, fans and even clothes lines to help us speed the process of drying things.
We also had a chance to finish our Arctic Monoprints. Today we were able to borrow some rollers, which helped us apply the paint more smoothly and evenly on our printing blocks. They look fantastic!


No comments:
Post a Comment